Connect your app stores.

Follow the published setup steps for Google Play Console, App Store Connect, and the final Stornar configuration flow without leaving the same guide workspace.

Google Play Console API Setup

Create a service account and download the JSON key file to connect Google Play with Stornar.

Prerequisites
You need a Google Play Developer account and access to Google Cloud Console. The service account email must be invited by the Google Play account owner.
1

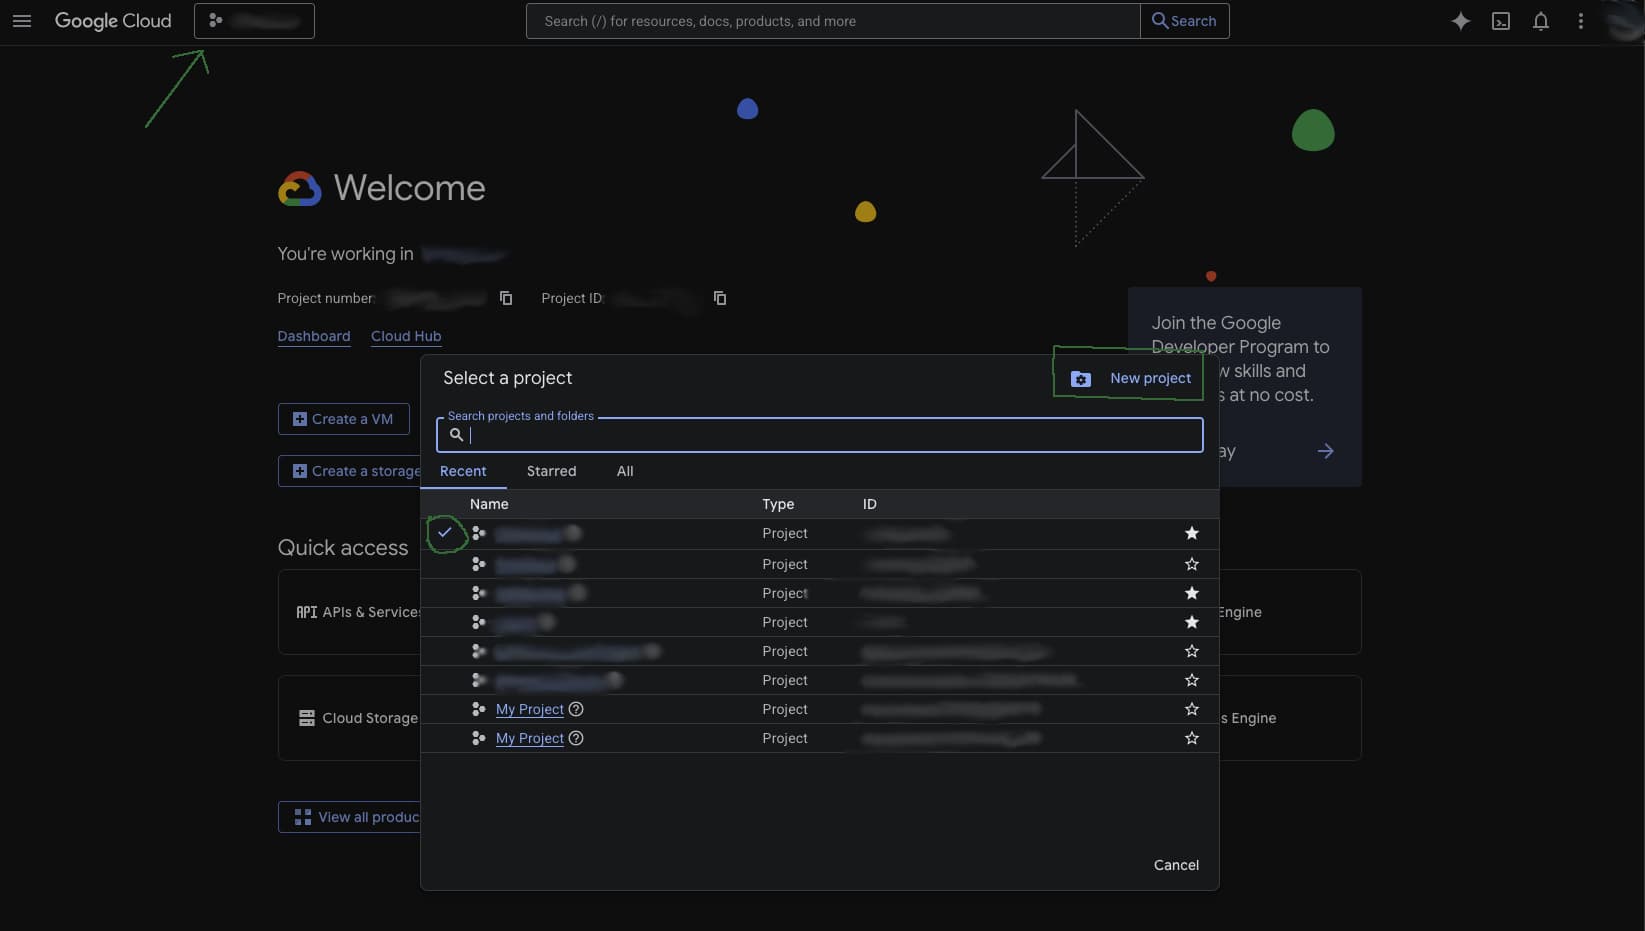
Create or Select a Google Cloud Project

Go to the Google Cloud Console and create a new project or select an existing one. This project will host the service account used to authenticate with the Google Play API.
2

Enable the Google Play Android Developer API

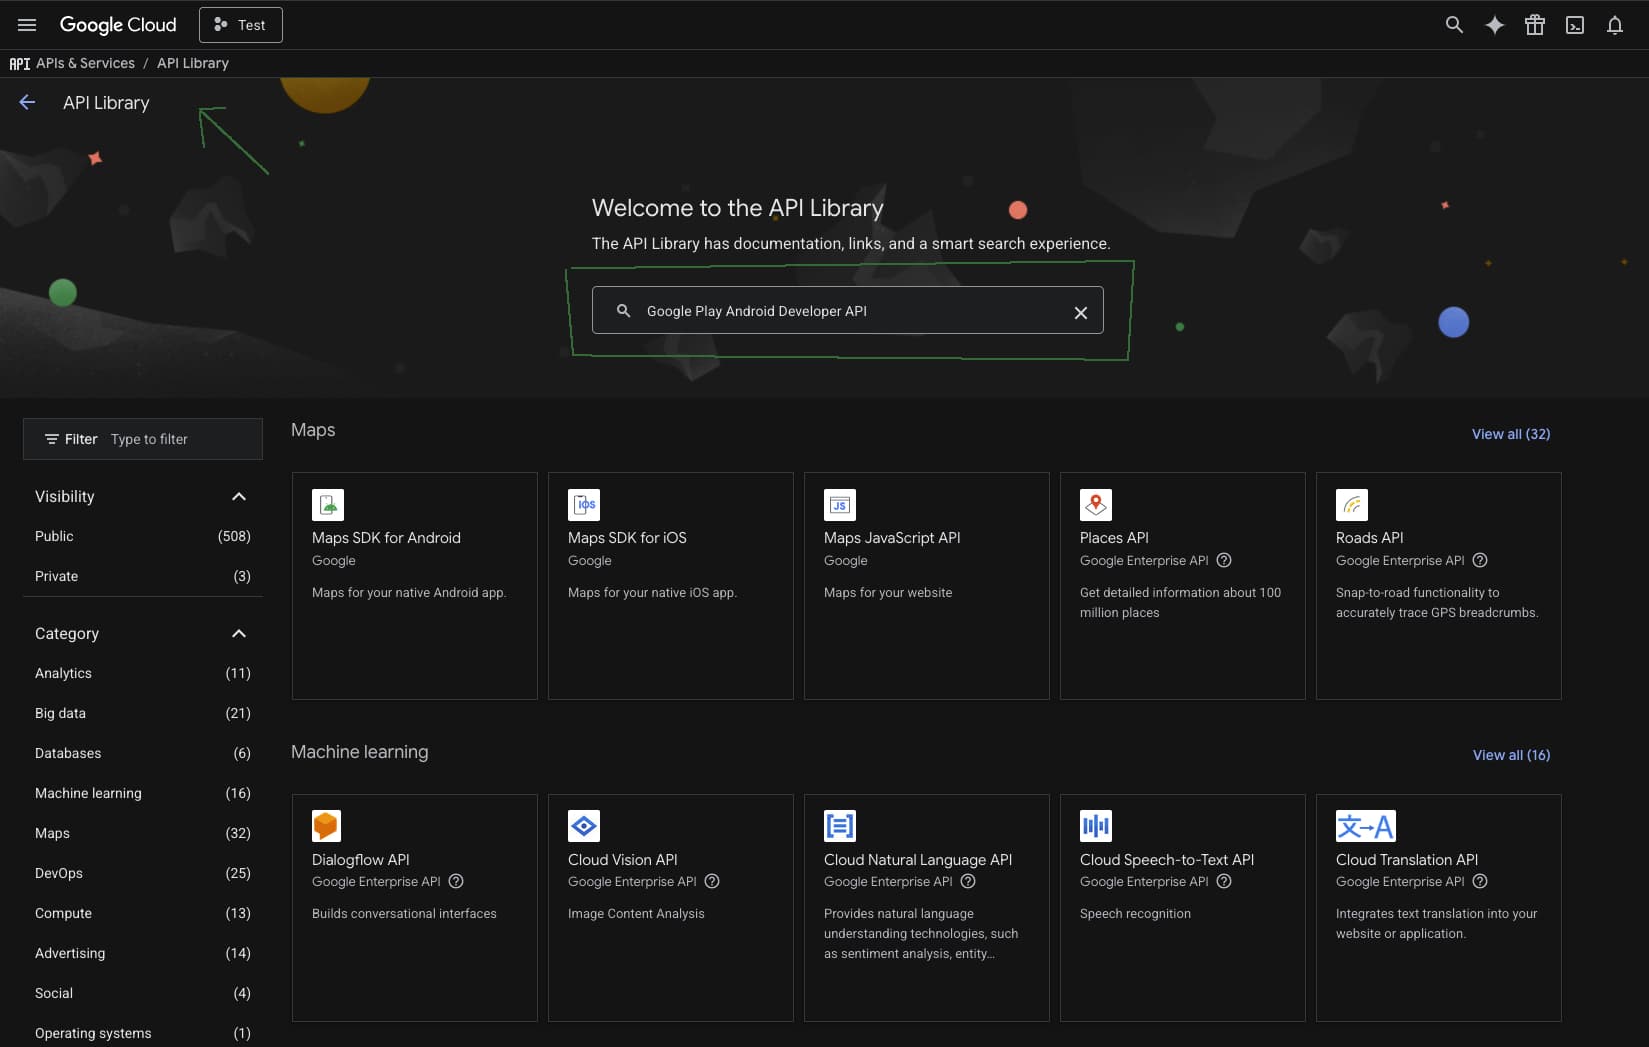
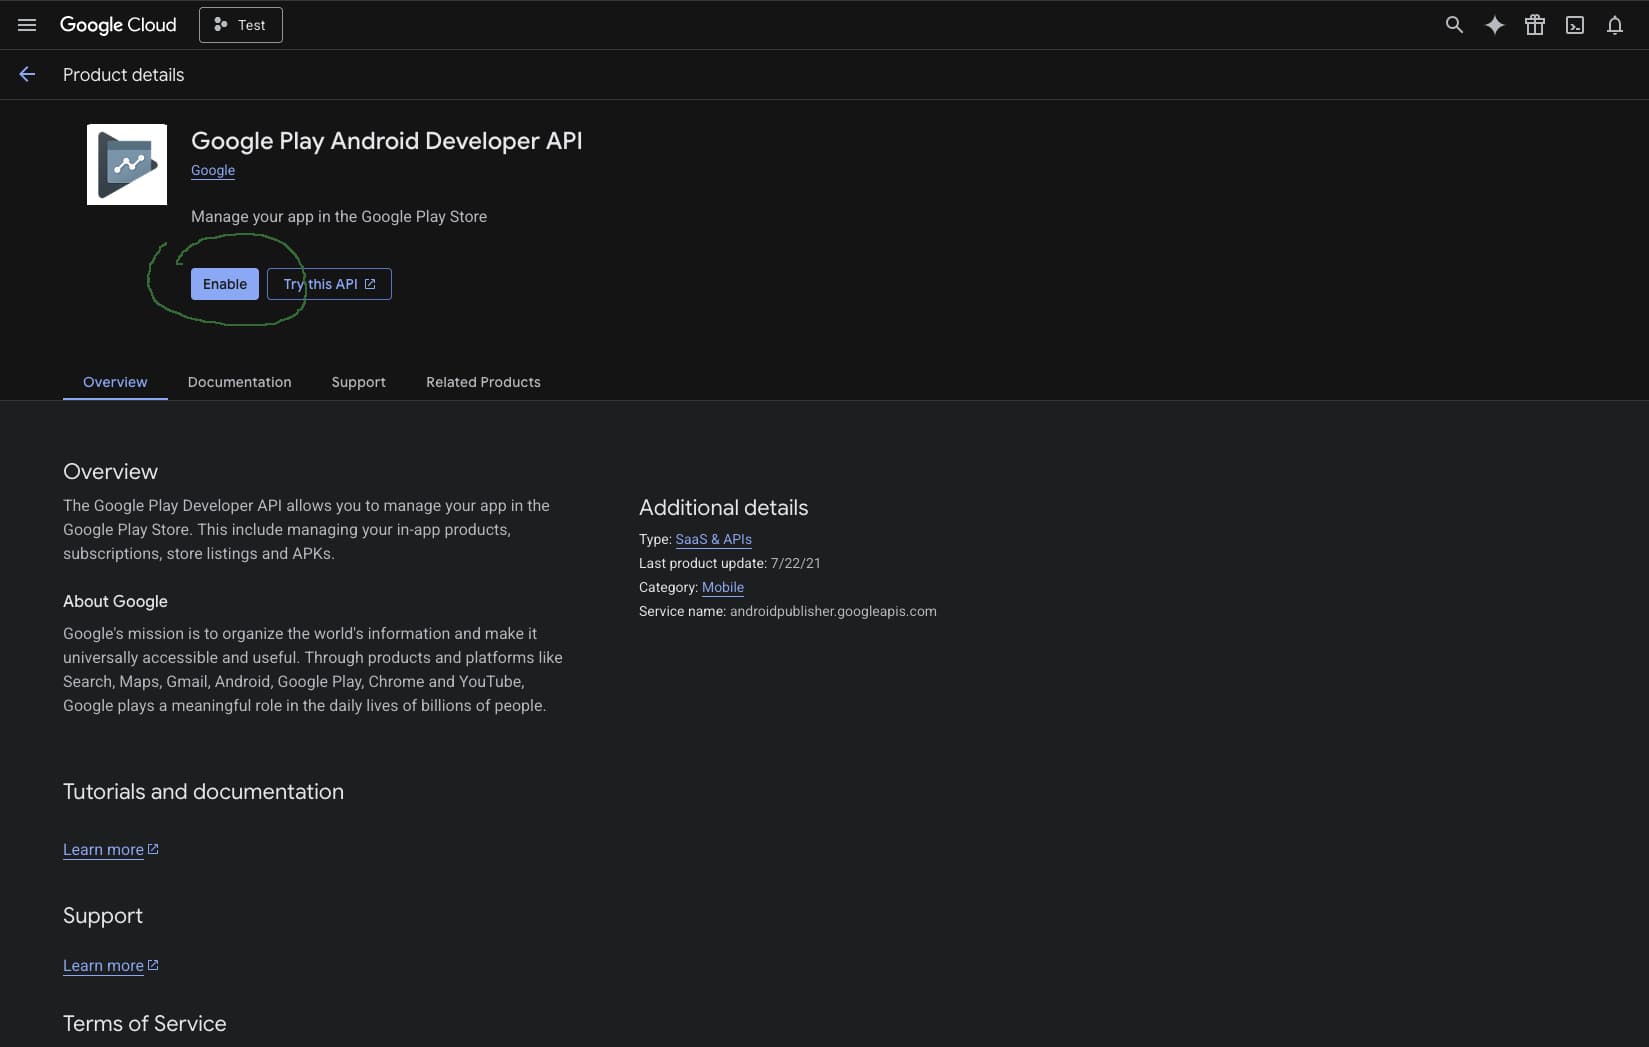
Navigate to APIs & Services → Library. Search for Google Play Android Developer API and click Enable. If the API is already active, you may see Manage instead. Make sure you enable the correct API, not the generic Google Play API.
3

Create a Service Account

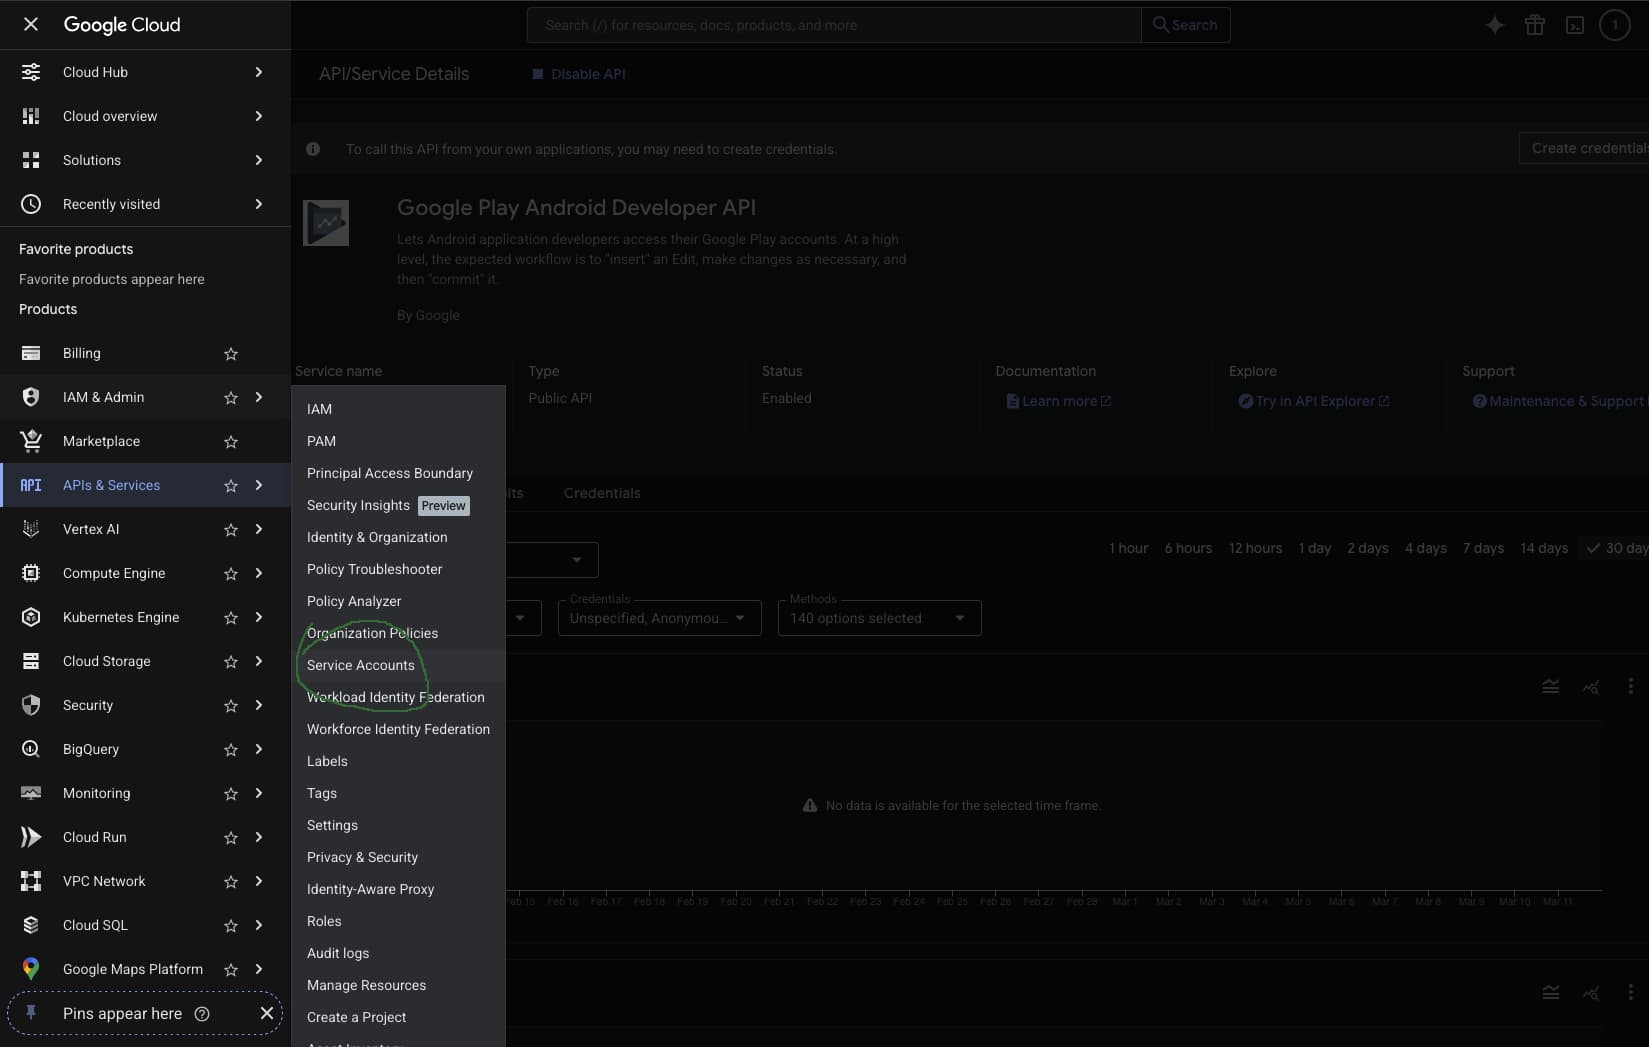
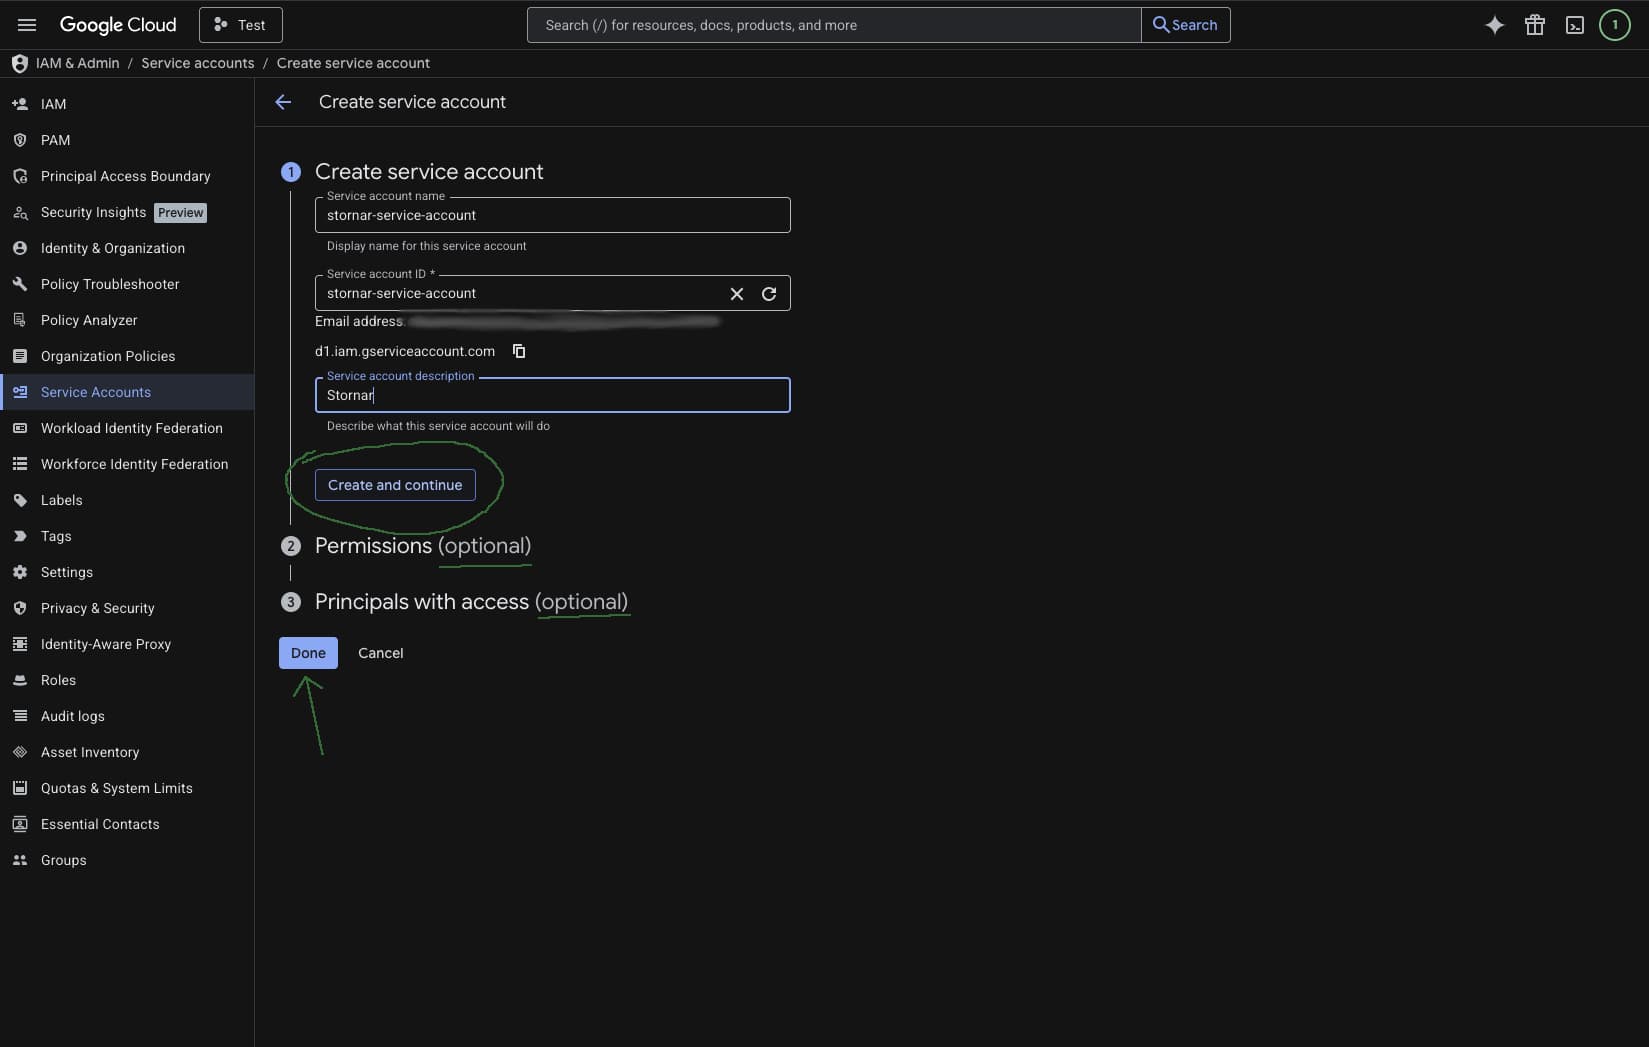
Go to IAM & Admin → Service Accounts and click Create Service Account. Enter a descriptive name and ID. You can skip the optional permissions step for now, permissions will be configured in Google Play Console.
4

Generate & Download the JSON Key

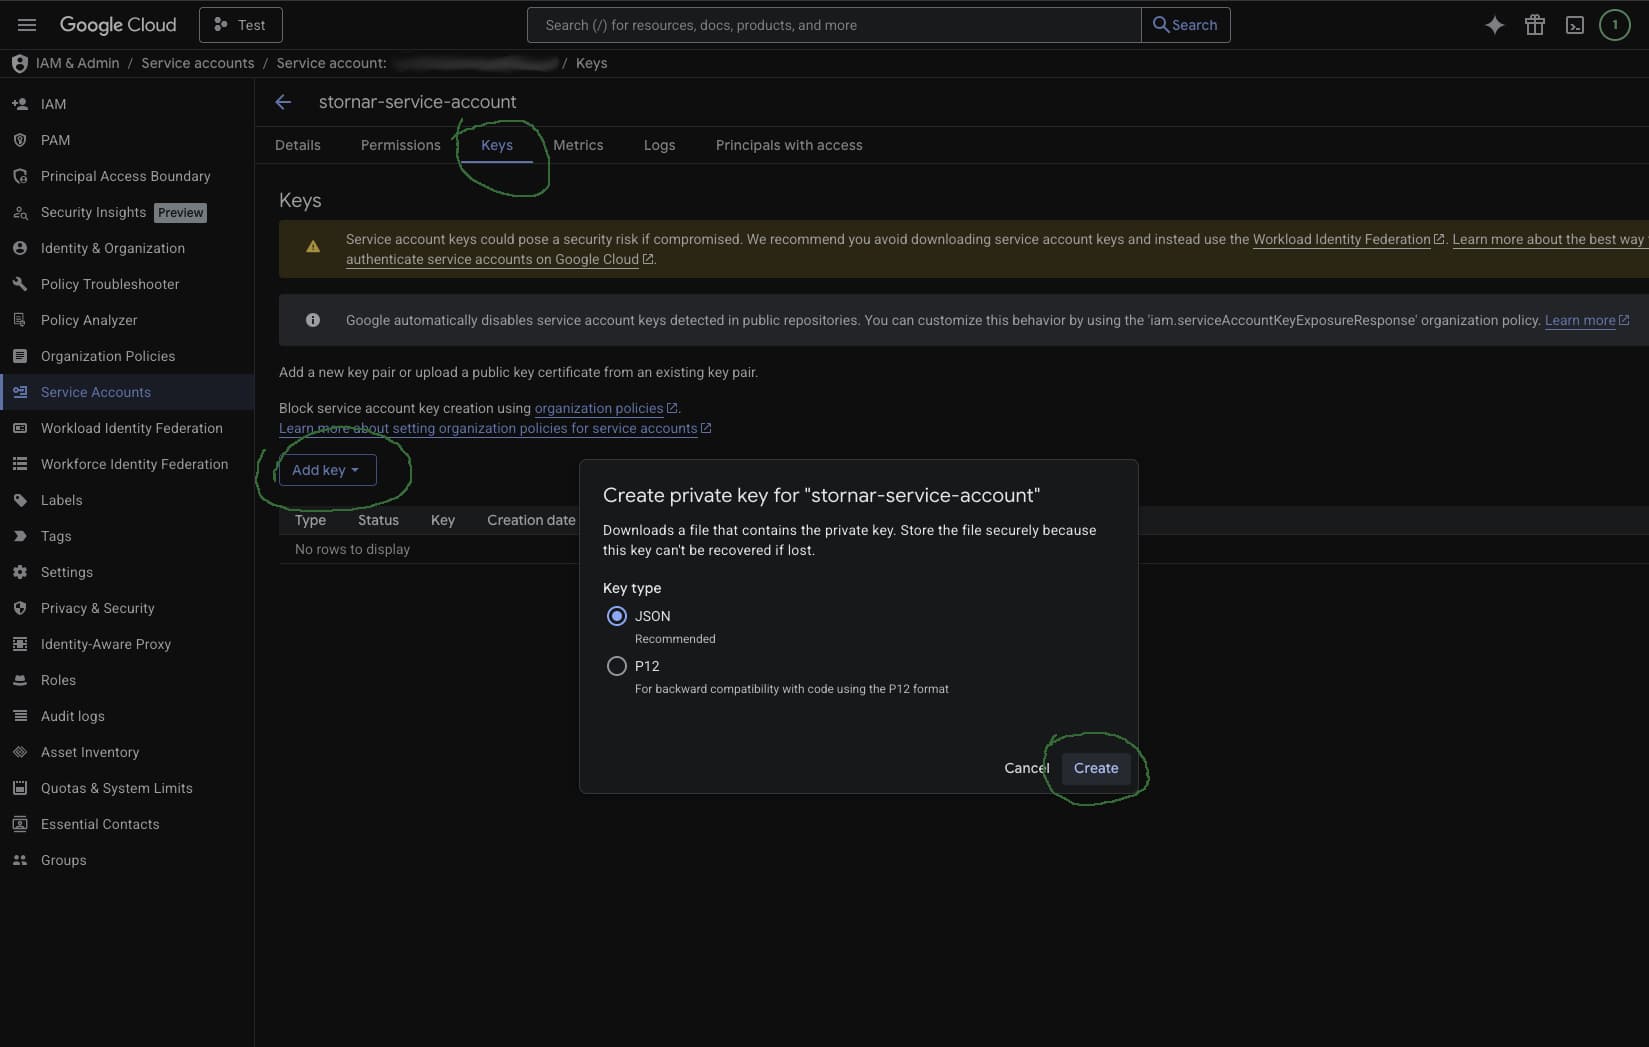
Open the service account you just created, go to the Keys tab, and click Add Key → Create New Key. Choose JSON format and click Create. A .json key file will download, store this securely.
5

Invite Service Account in Google Play Console

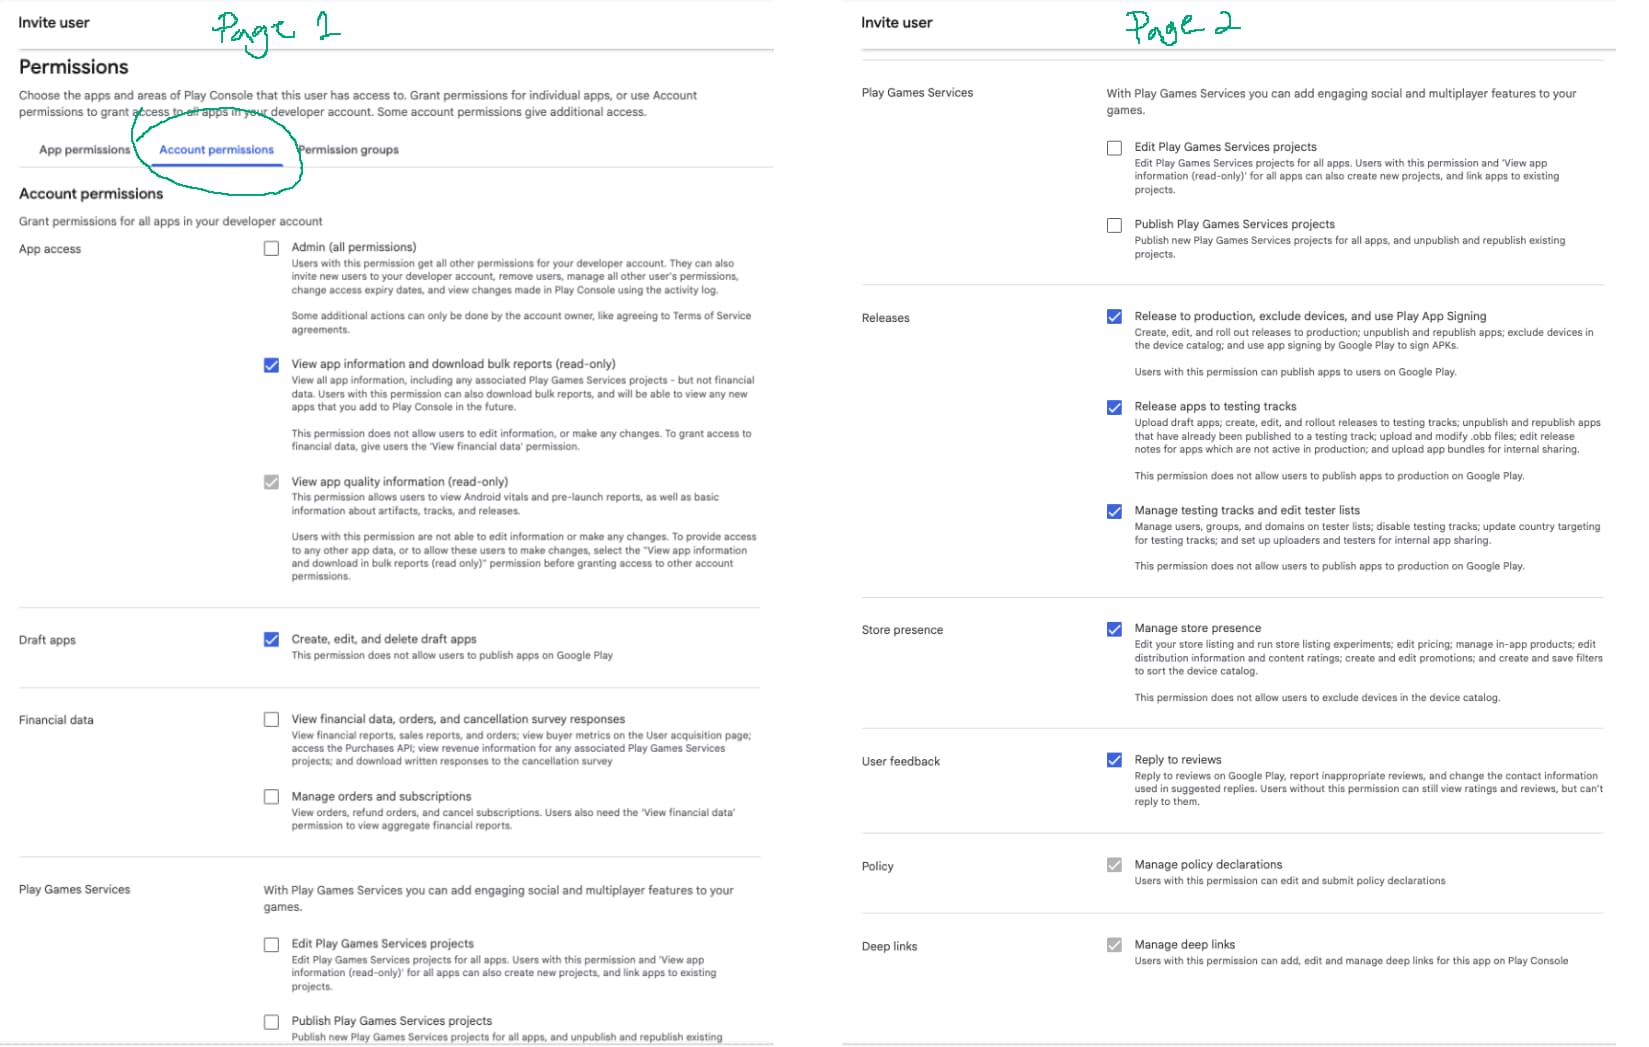
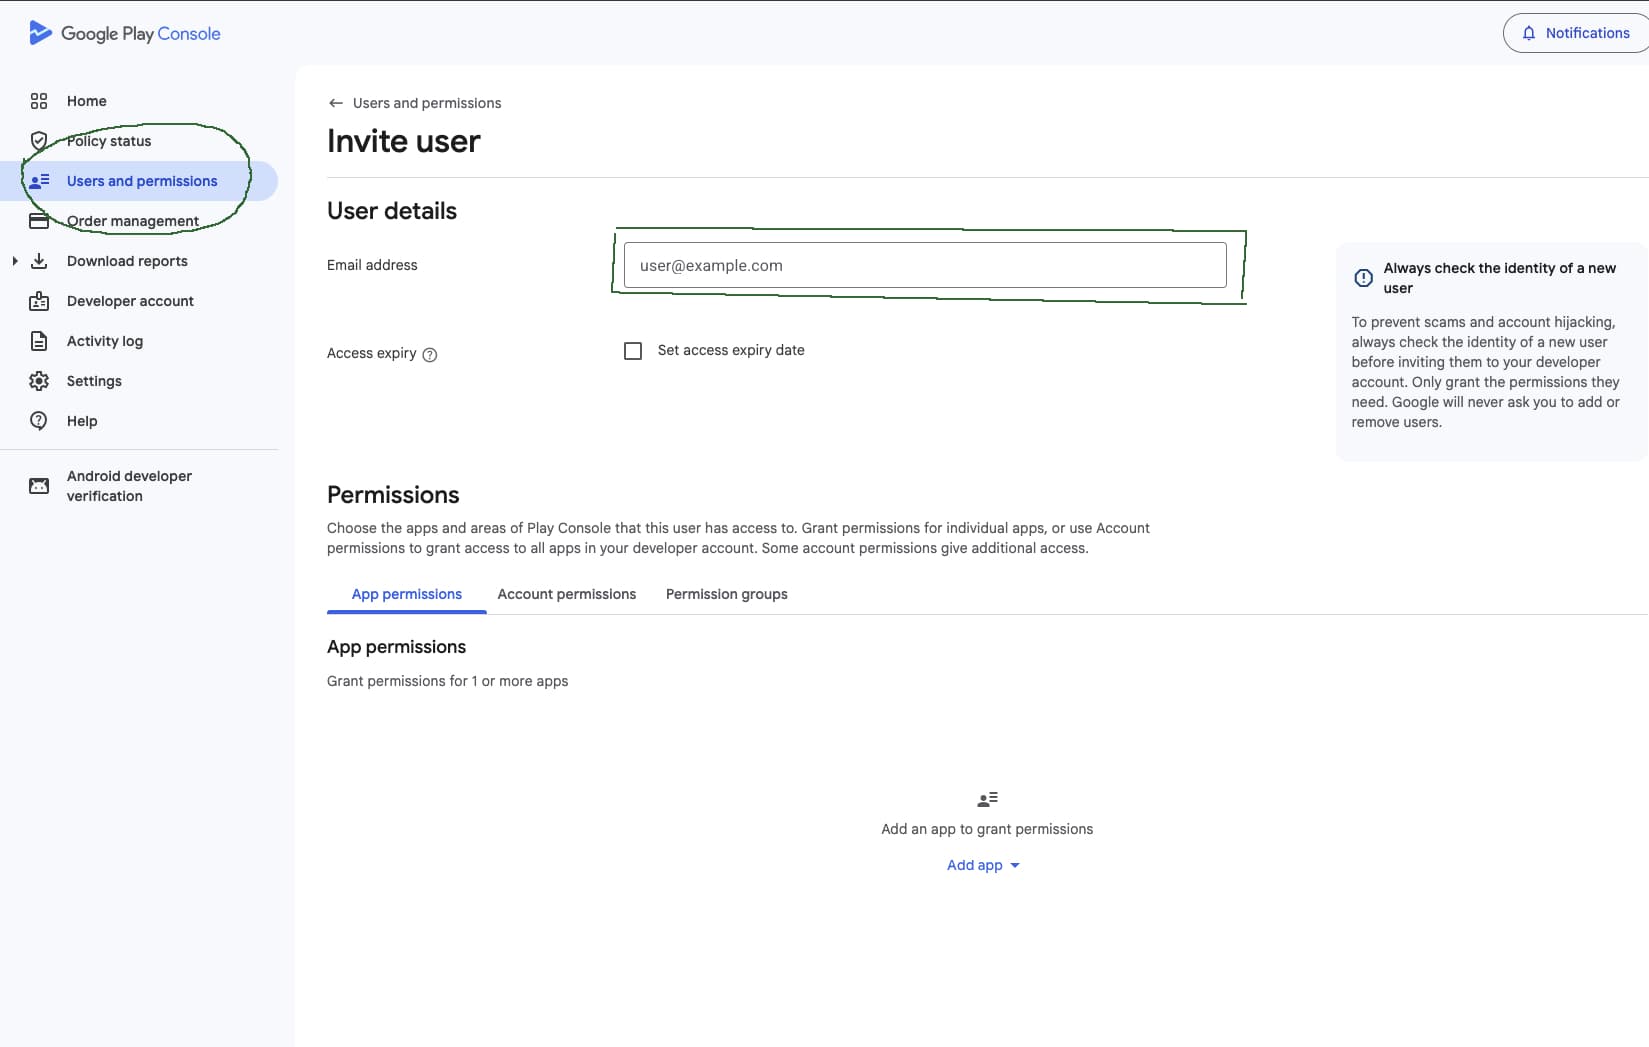
In Google Play Console, go to Users and Permissions. Click Invite new users and paste the service account's email address (found in Google Cloud Console under Service Accounts).
6

Grant Required Permissions

Assign the service account the permissions it needs: View app information and download bulk reports, Release apps to testing tracks, or Manage production releases depending on your use case. Then click Invite user.

You're all set with Google!

Keep your downloaded .json key file safe. You will need it for the Stornar Configuration step.


App Store Connect API Setup

Generate an API key and download the .p8 file to connect App Store Connect with Stornar.
Prerequisites
You need an Apple ID with Account Holder or Admin role in App Store Connect. Other roles cannot generate API keys.
Important
The .p8 key file can only be downloaded once. If you lose it, you must revoke the key and generate a new one.
1

Log in & Navigate to Integrations

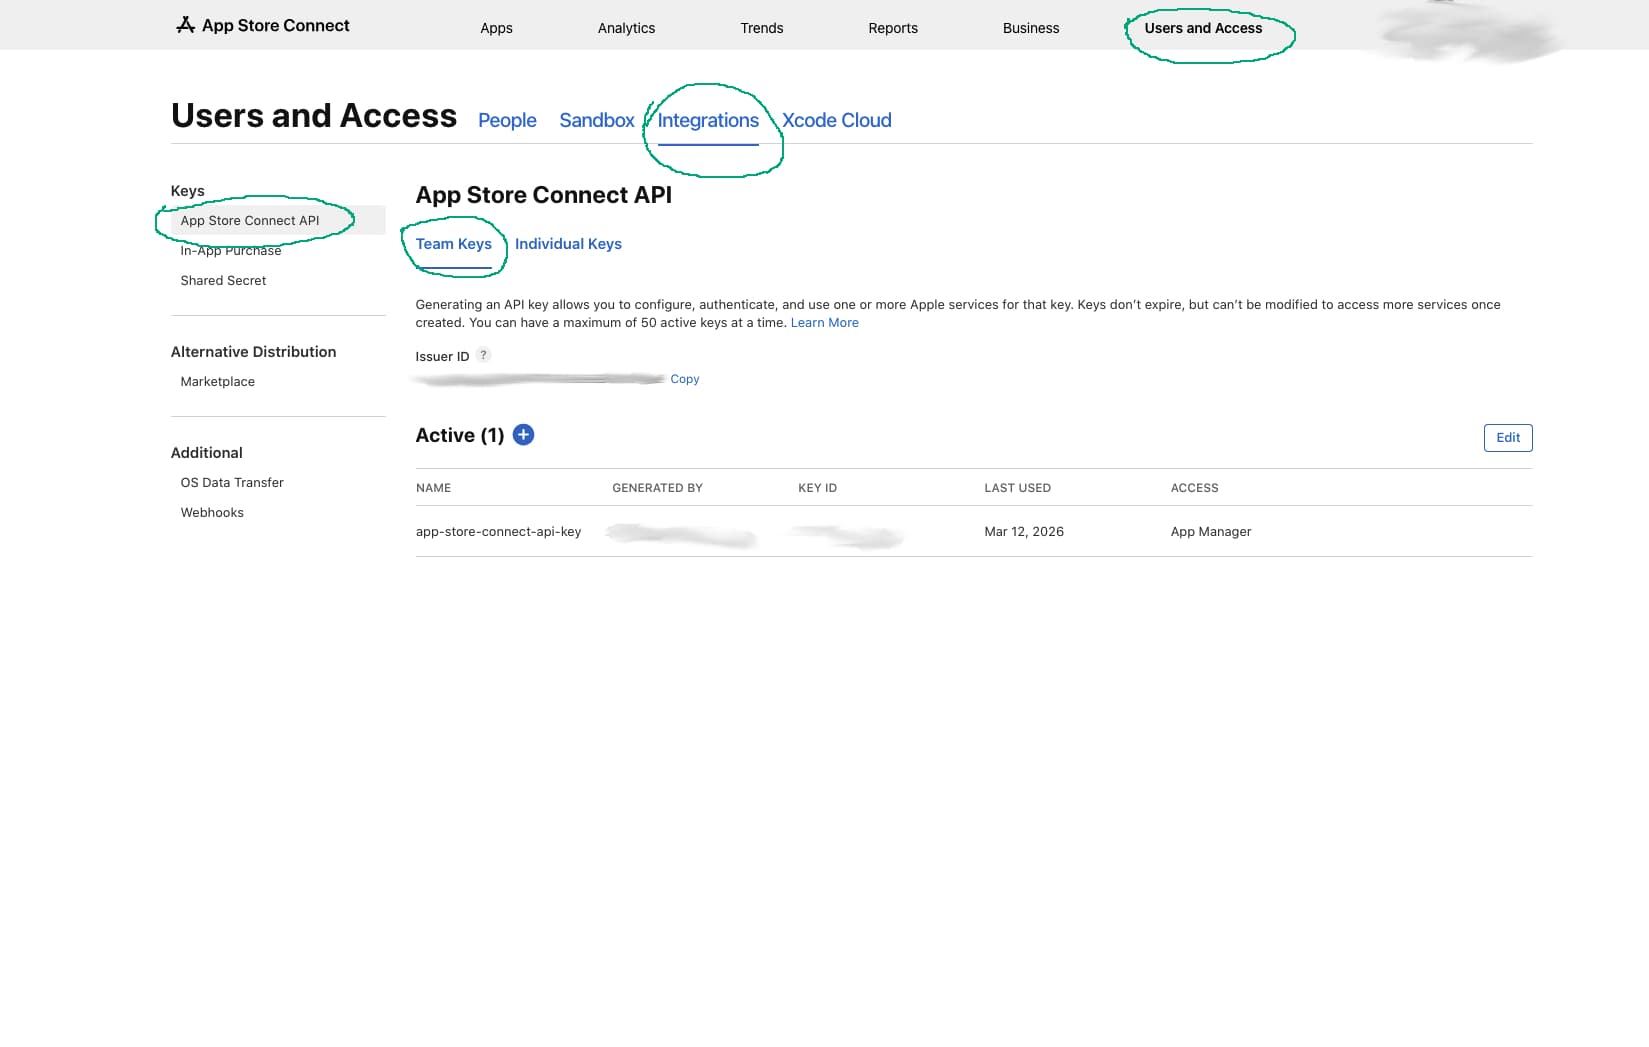
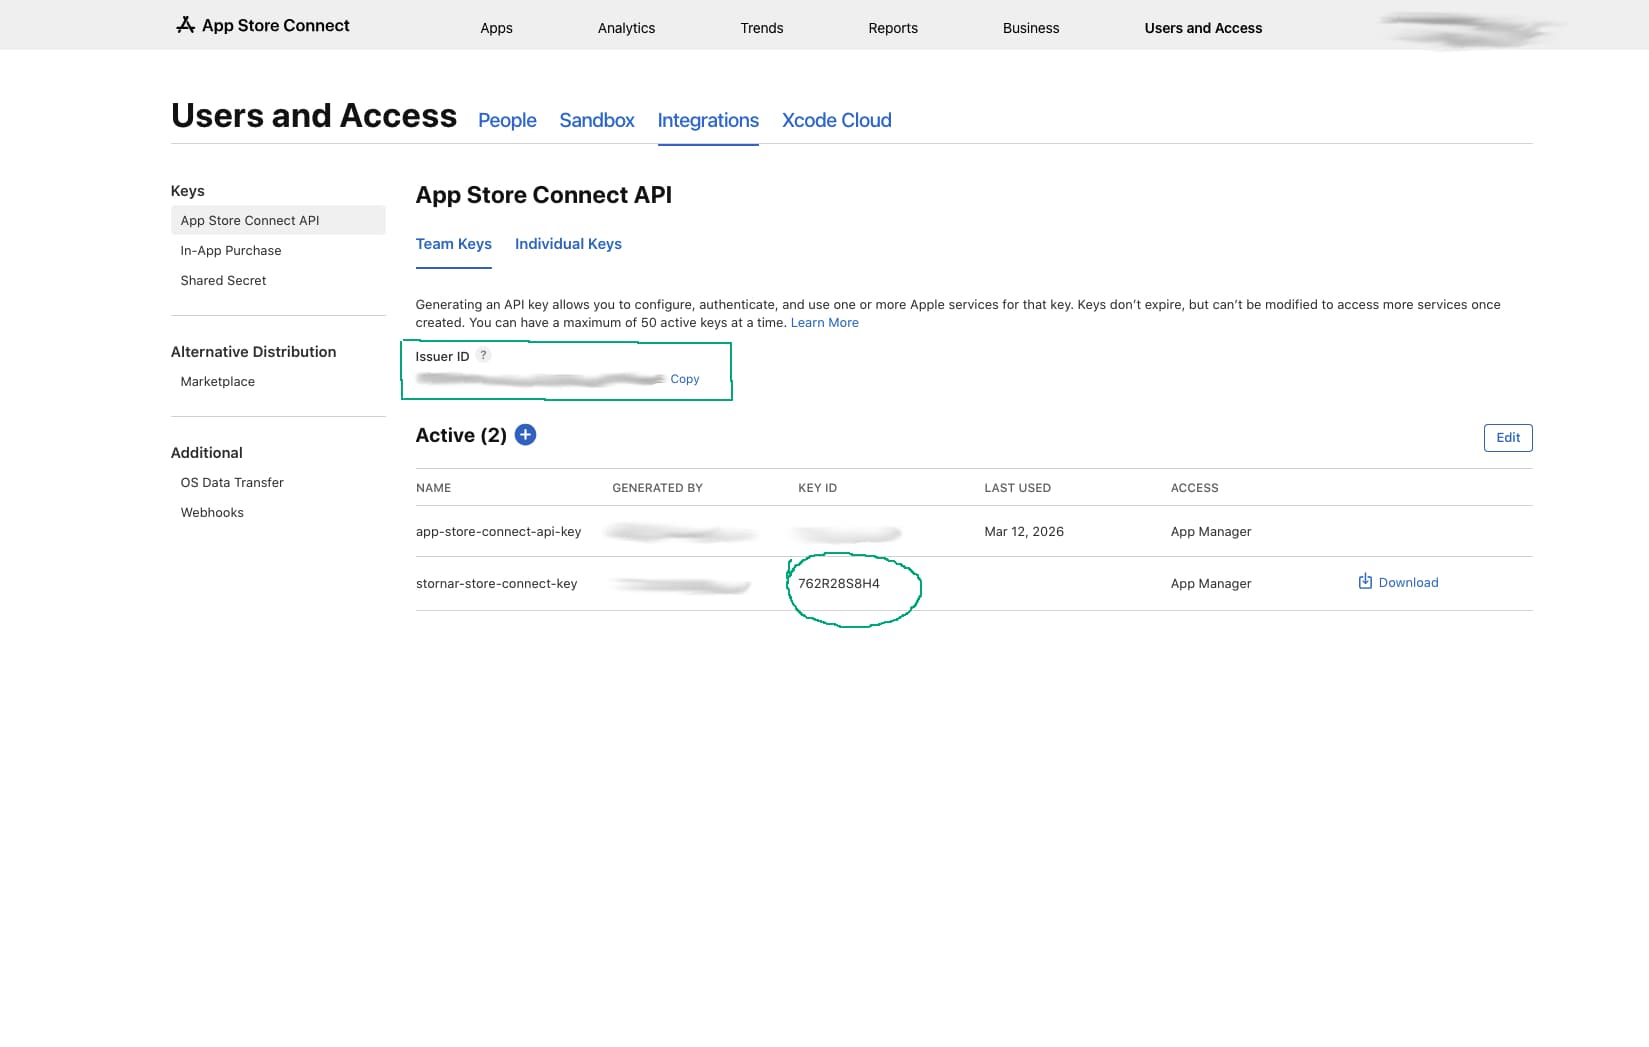
Access App Store Connect using an Apple ID with the Account Holder or Admin role. Only these roles can generate API keys. Then go to Users and Access → Integrations, select App Store Connect API in the left sidebar, and click the Team Keys tab.
2

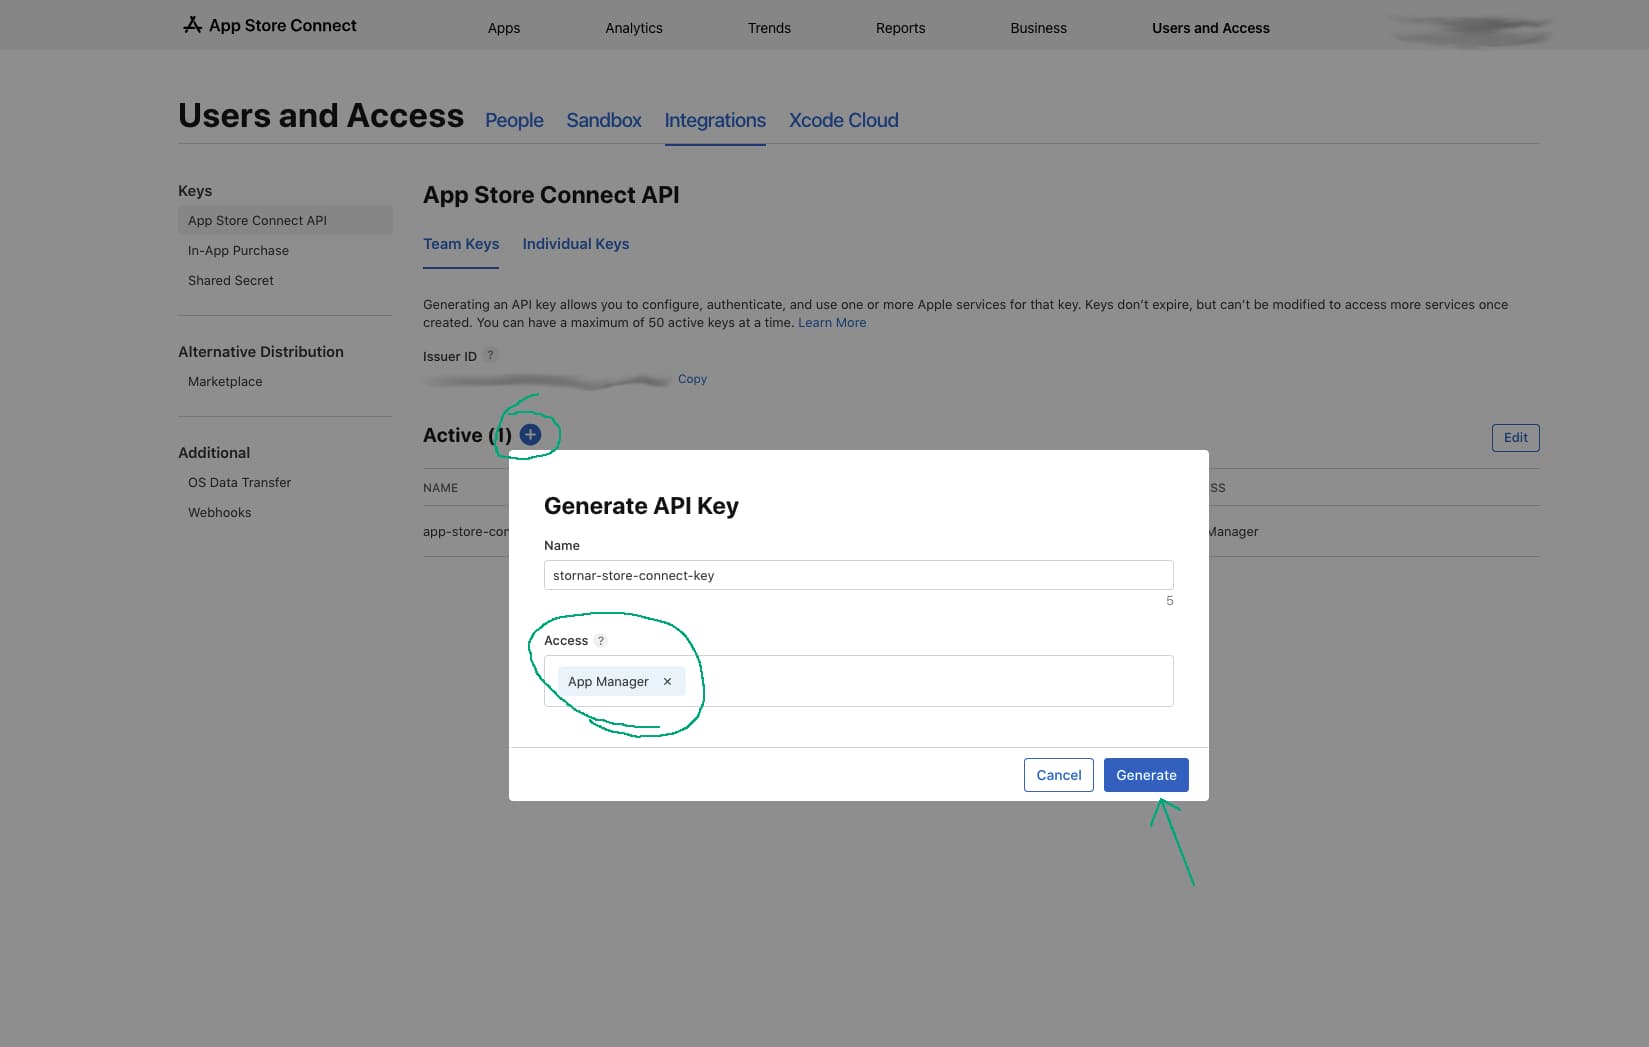
Generate a New API Key

Click the + button or Generate API Key. Give it a descriptive name (for your reference only) and select the appropriate access role: Admin for full access or App Manager for limited app management.
3

Download the .p8 Key File

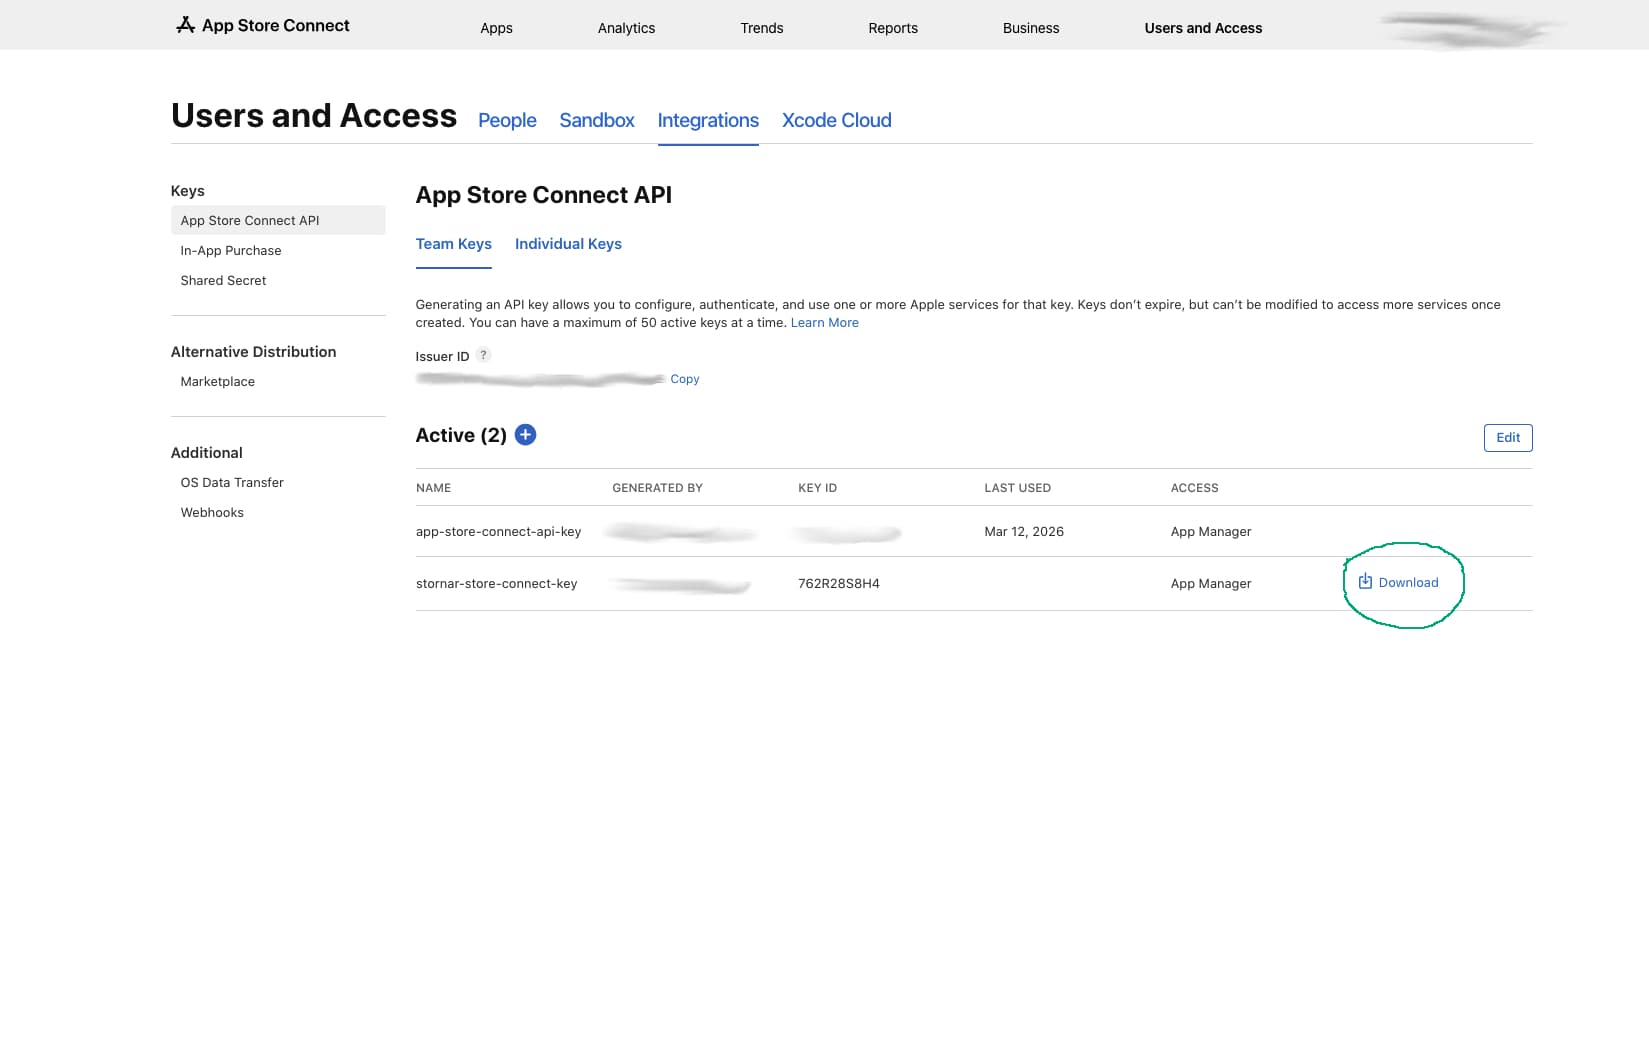
After generating, immediately download the .p8 key file. This file can only be downloaded once. If you lose it, you must revoke the key and create a new one. Store it in a secure location.
4

Note Your Key ID & Issuer ID

The Key ID is shown next to your generated key in the table. The Issuer ID is displayed above the list of active keys. You will need both of these, along with the .p8 file, to authenticate with the API.
You're all set with Apple!

Keep your .p8 file, Key ID, and Issuer ID safe. You will need them for the Stornar Configuration step.


Stornar Configuration

Import your credentials and apps into Stornar to start managing your releases in one place.
Prerequisites
Make sure you have already generated your Google Play Console JSON key file and/or your App Store Connect .p8 key file before continuing.
1

Open Credentials Settings

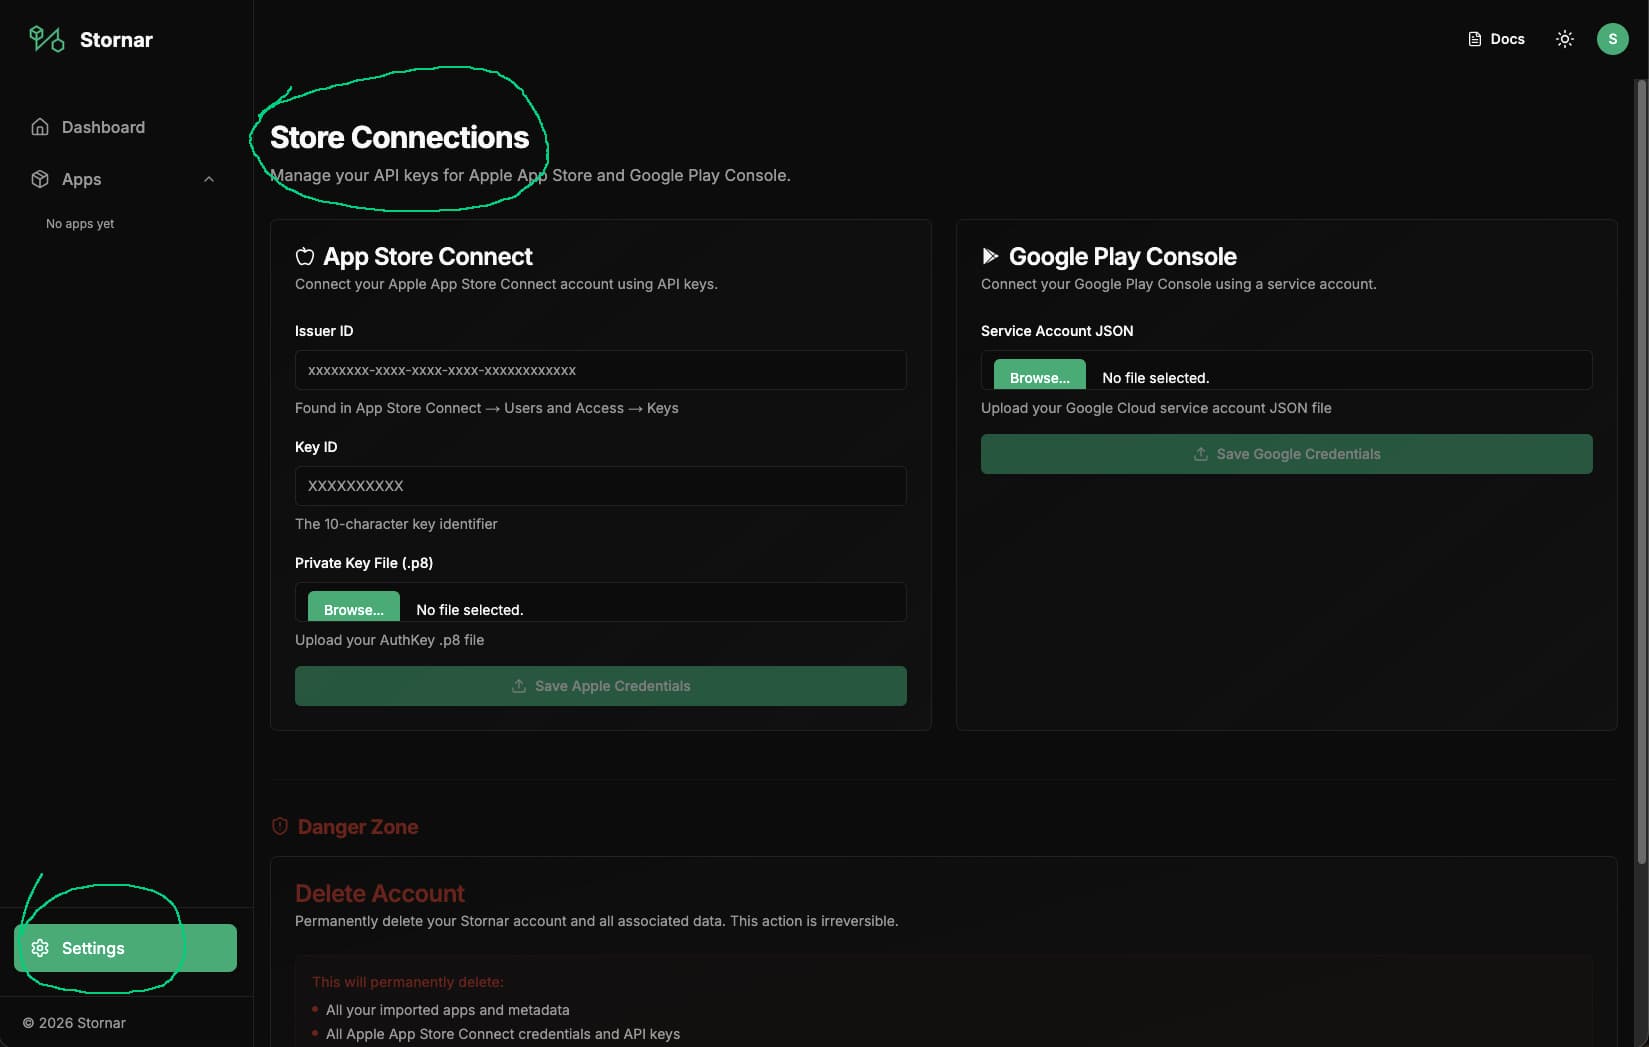
Log in to your Stornar dashboard and navigate to Settings → Store Connections. This is where you manage all your connected API credentials.
2

Import Google Play Console Credentials

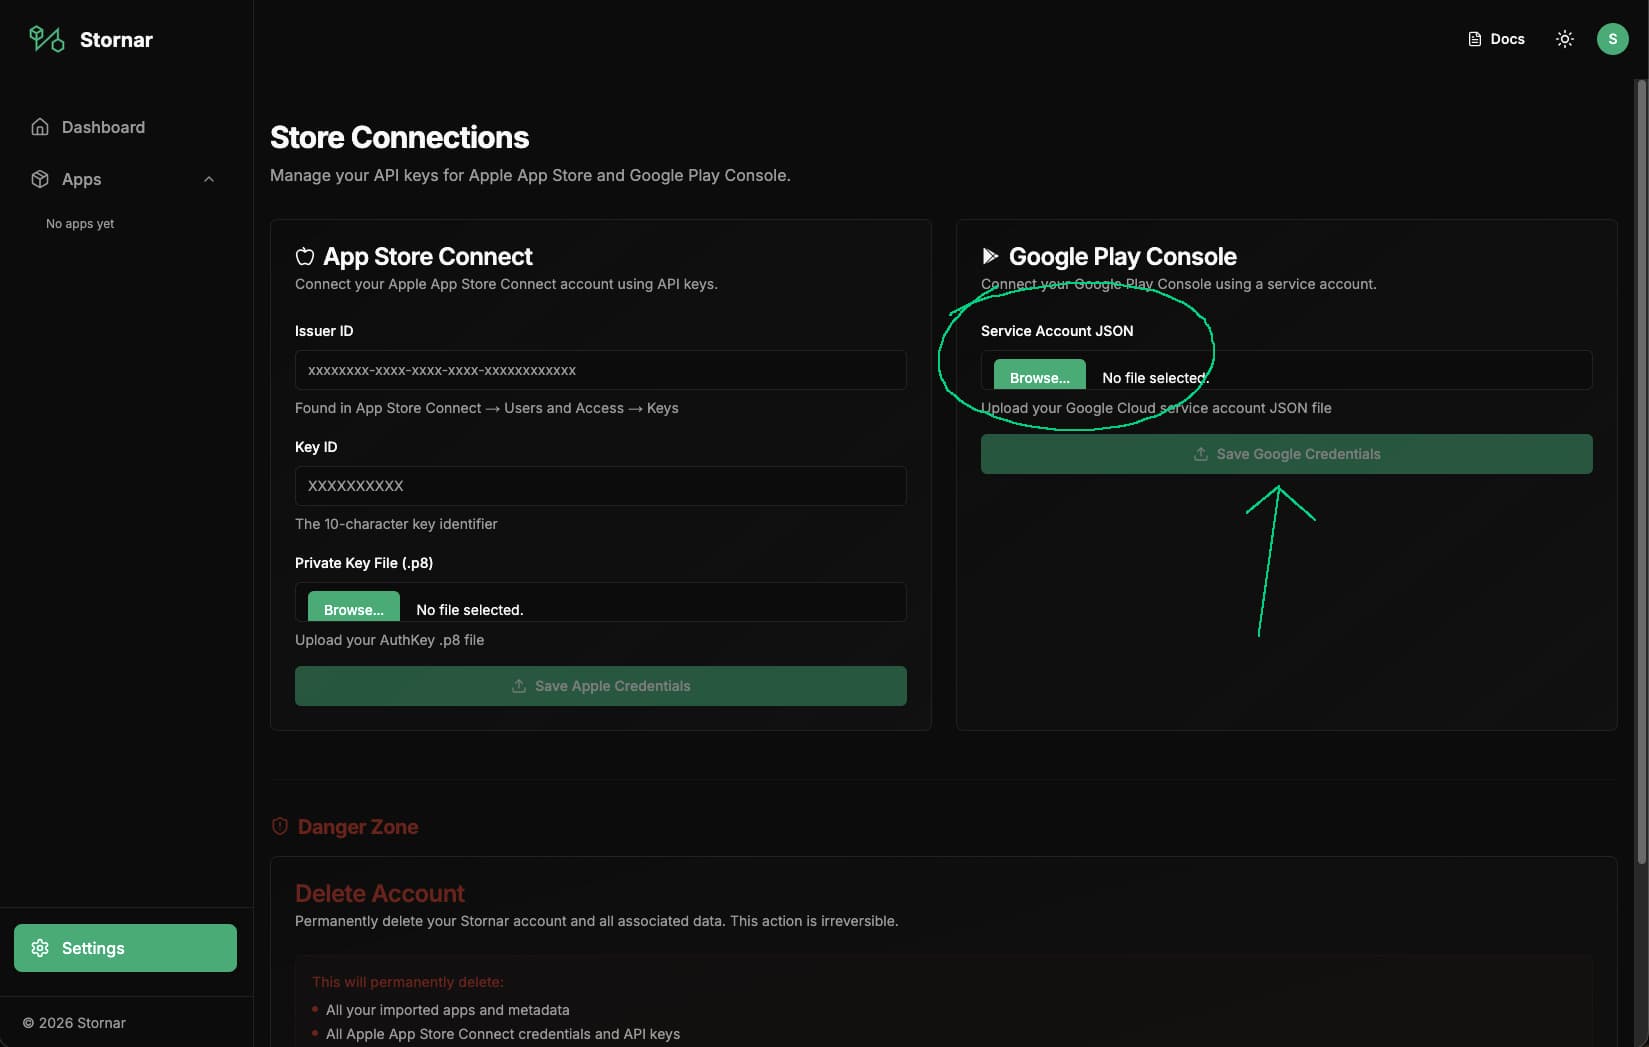
Click Browse... to upload the .json service account key file you downloaded from Google Cloud Console. Don't forget to click Save Google Credentials after selecting the file.
3

Import App Store Connect Credentials

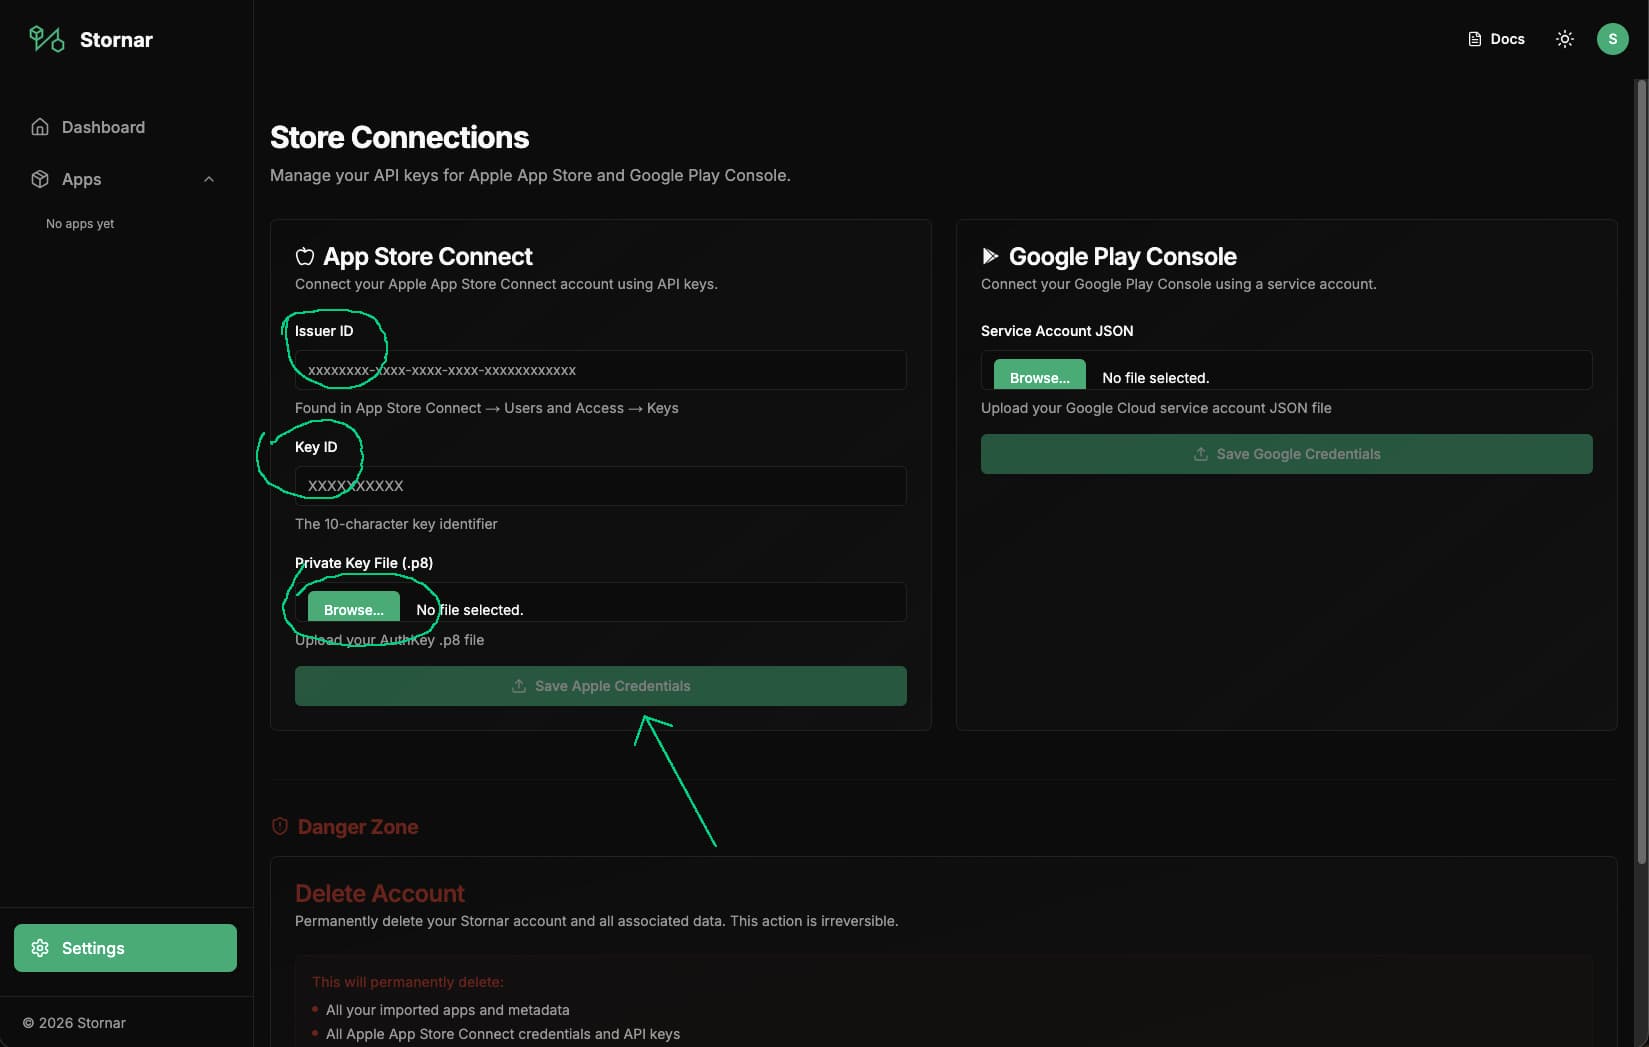
Click Browse... to upload the .p8 key file, then enter your Key ID and Issuer ID (*App Store Connect document tab → Step 4) from App Store Connect. Don't forget to click Save Apple Credentials after selecting the file and entering the required information.
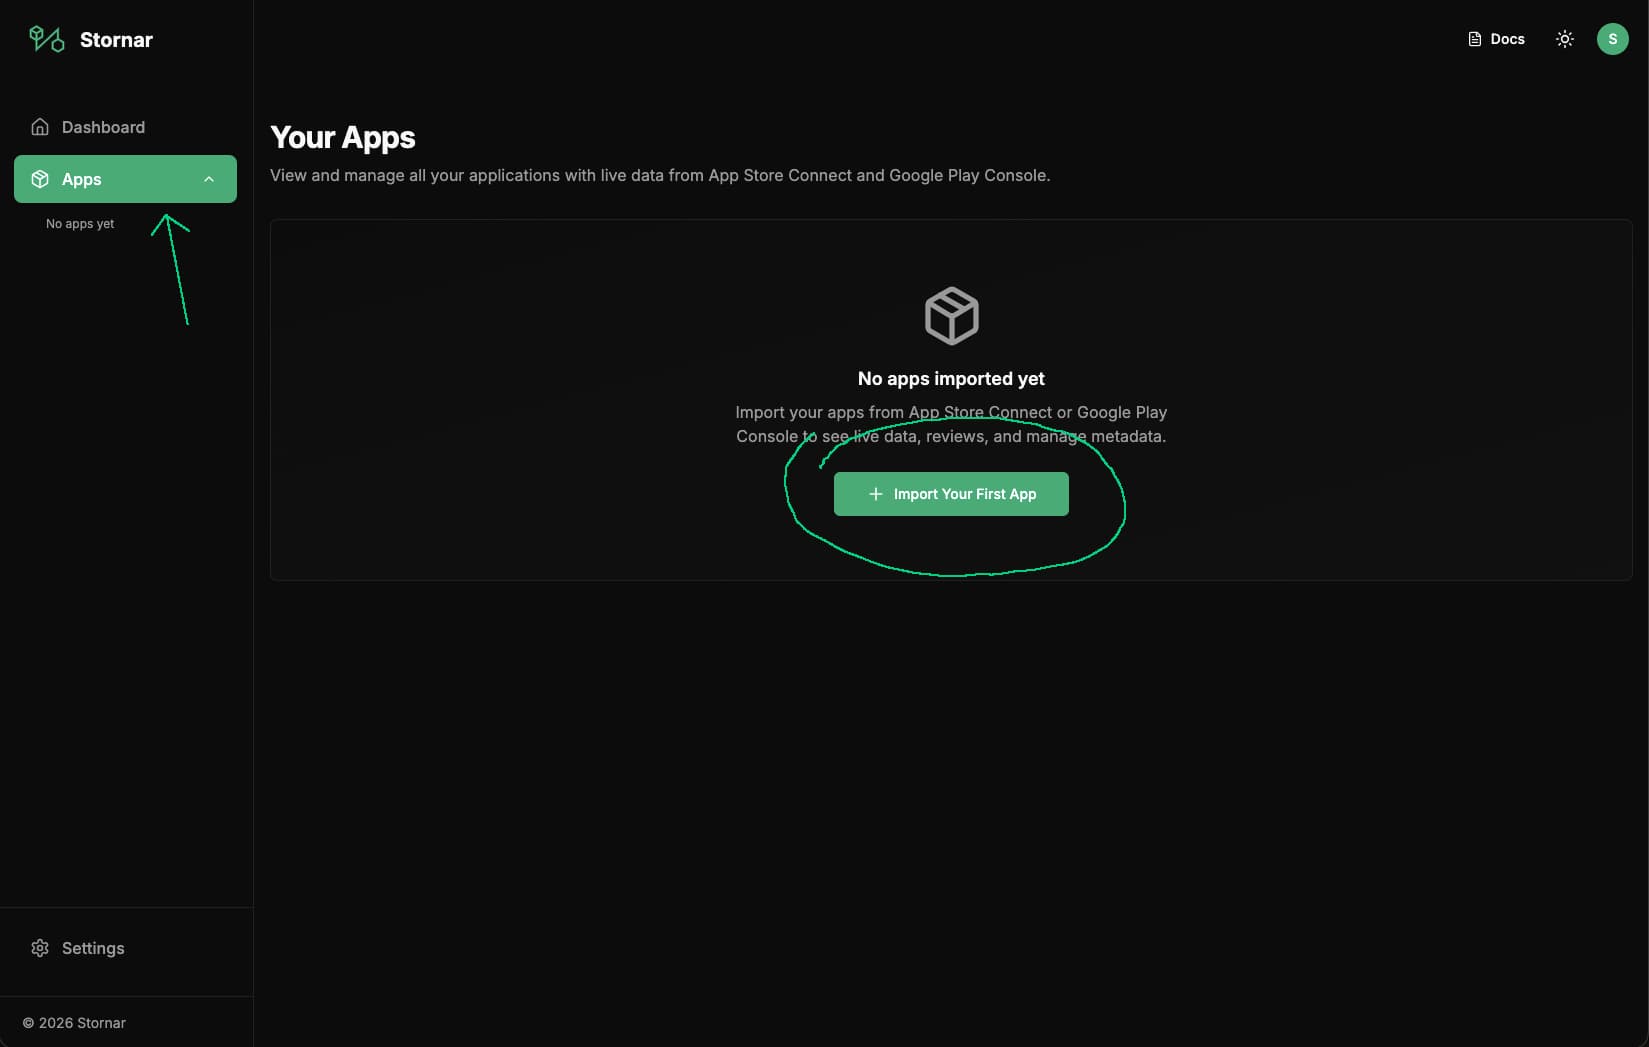
4

Go to Apps & Import Your First App

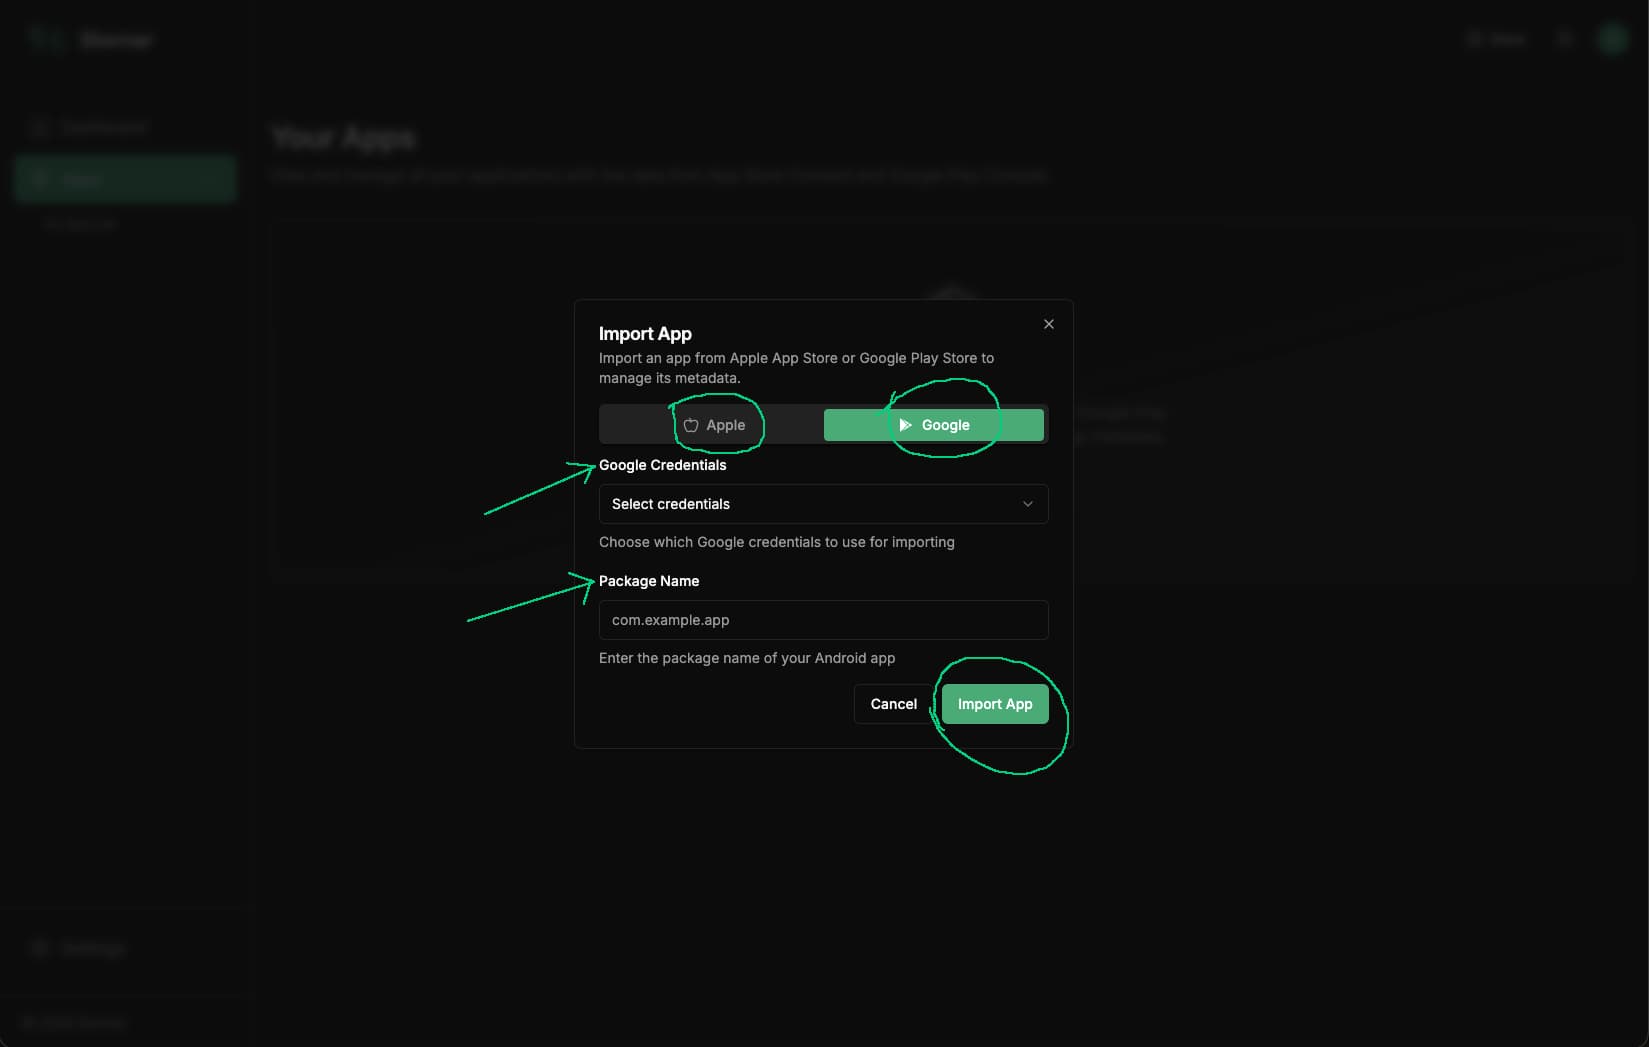
Navigate to the Apps section in the left sidebar. Click Import Your First App and choose the platform (Google Play or App Store Connect) you want to import from.
5

Select Credential & Import Apps

From the dropdown, select the credential you just added. Stornar will fetch your apps automatically for ios apps. For Android, you may need to enter your Google Play Package Name to identify the app. Review the app and click Import App to add them to your dashboard. Repeat this step for each app per platform.

Security Principles

Credential safety matters more than speed. Common mistakes to avoid.

Never Share Key Files Publicly

Your .json and .p8 key files contain sensitive credentials. Never post them on forums, share in chat, or upload to public locations.

Don't Commit Keys to Version Control

Add key files to your .gitignore immediately. Accidentally pushing secrets to GitHub or any VCS is one of the most common security mistakes.

Don't Give Excessive Permissions

Follow the principle of least privilege. Only grant the minimum permissions your service account or API key actually needs.

Don't Keep Unused or Compromised Keys

Regularly audit your active keys and revoke any that are no longer needed or that you suspect have been compromised.

Don't Ignore Key Rotation

Periodically rotate your keys, especially for production environments. This limits the blast radius if a key is ever leaked.

Need technical support?

Share what platform you're connecting and where the setup is failing so we can route it quickly.